VDL Vehicle Solutions

Blog

  • Fleet Servicing Without The Downtime

    πŸ“ž 07803 397561 βœ‰οΈ info@vdlvehiclesolutions.co.uk πŸ“ Derbyshire Β· Staffordshire Β· Cheshire Emergency Call-Outs Available
    Home β€Ί Blog
    Vans, Fleet & Security

    Fleet Servicing Without The Downtime

    VDL Vehicle Solutions Β· 13 November 2026

    For most small fleets the invoice for a service is the cheap part. The expensive part is the van sitting still while somebody drives it somewhere, waits, and drives it back.
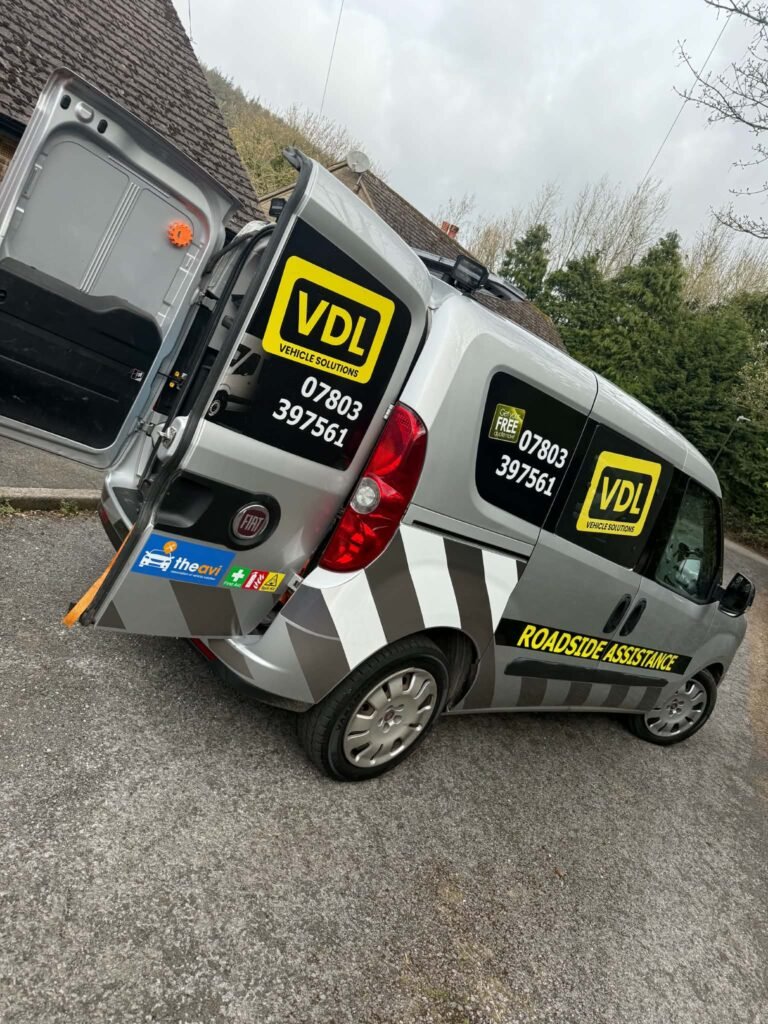
    Mobile mechanic van parked with the rear doors open and tools out on a roadside job

    Work out what a van earns in a day, then work out what it costs you to have it off the road for one. For most trades running three to ten vehicles, that number is several times the price of the service itself. Add the driver who is not working while he waits, or the second man sent to drop off and collect, and a routine oil and filter change quietly becomes one of the more expensive things you do all year.

    None of that is an argument for skipping services. Deferred maintenance on a working van is the most reliable way to turn a planned hour into an unplanned day. It is an argument for arranging the work so it lands when the vehicle was not earning anyway.

    Service Where The Vans Already Are

    The obvious fix is to stop moving the vehicle. If a van is parked in a yard, on a site compound or outside a driver’s house overnight, that is somewhere a service can happen. Oil and filters, brakes, discs and pads, belts and pulleys where access allows, diagnostics, tyres pressures and condition, wipers, bulbs, battery and charging tests β€” the bulk of scheduled maintenance does not need a ramp, it needs space, light and somebody who does it properly.

    The two variations that work best for fleets are the early start and the end of shift. Vans that go out at seven can be seen from six. Vans that come back at four can be worked on from four. Either way the vehicle is back on its keys before it was next needed, and nobody has spent half a day in a waiting room.

    Heavier work is different and it is worth being honest about that. Clutches, gearbox removal, head gaskets, anything needing the vehicle properly supported for hours β€” those get booked in with us as a planned job, at a time you have chosen, with a cover vehicle sorted if you need one. The point is not that everything happens on the drive. The point is that the routine 80 per cent does, so the disruptive 20 per cent is the only thing you have to plan around.

    Stagger Them Or They All Come Due Together

    Most small fleets buy vehicles in batches. Two vans in the spring when a contract starts, another two eighteen months later. The result is predictable: they hit their service intervals within a fortnight of each other, usually in the week you are busiest, and you end up either doing all of them at once or putting them all off.

    Staggering deliberately is worth the small amount of effort. When a batch arrives together, bring one service forward a couple of thousand miles so the pair separate, then let them run on their own cycles. You lose a fraction of oil life once and gain a fleet that never presents you with four vehicles needing attention in the same week.

    The same applies to MOTs. A fleet where every test falls in the same month is a fleet with a guaranteed bad month. If you are buying used vans, checking the existing test date before you commit is a genuinely useful five seconds.

    Worth knowing: mileage and time both count, and whichever comes first is the one that matters. A van doing 30,000 miles a year needs servicing on mileage. A van doing 4,000 miles of short local runs needs servicing on time, and probably harder than the book suggests β€” short journeys never get the oil properly hot, so it degrades faster, not slower.

    Keep A Schedule That Somebody Will Actually Use

    Fleet software exists and it is fine, but nothing beats a schedule simple enough that it gets filled in. One row per vehicle, and for each one: registration, last service date and mileage, next service due date and mileage, MOT date, tyre change dates, and a notes column for anything that was flagged but left.

    That last column earns its keep. It is where you write “nearside front tyre 3mm, watch it” or “advisory on rear brake pipe corrosion” so that in three months’ time somebody knows to look rather than rediscovering it. Drivers should be told to report mileage monthly, because a schedule based on guessed mileage is not a schedule.

    Spot The Vehicle That Keeps Coming Back

    Every fleet eventually has one. On paper it is the same age and spec as the others, but it is always the one with a fault, and because each individual repair is small nobody adds them up.

    Add them up. Once a year, total what each vehicle has cost in parts, labour and downtime. The bad one is usually obvious the moment the numbers are side by side, and the decision to move it on stops being a hunch. Sometimes the cause is the driver rather than the van β€” clutches, brakes and tyres tell you a lot about how a vehicle is being used, and a driver wearing out clutches at twice the rate of everyone else is a training conversation, not a mechanical one.

    Standardise The Spec So Parts Are Predictable

    Running five vans that are the same model, same engine and same year is easier in every respect than running five different ones. Common parts, common consumables, common faults you have already seen once. Filters and brake components can be kept on the shelf. A fault diagnosed on one vehicle is half diagnosed on the next four.

    Lighting and security are worth standardising too. If every vehicle has the same beacons, work lamps and marker lights and the same locking arrangement, drivers know what they are looking at, spares fit everything, and you are not learning a new system each time a vehicle joins the fleet. Mixed specs cost you in small amounts constantly, and the cost never appears as a line on any invoice.

    Where This Ends Up

    A fleet that is serviced on its own premises, on a staggered schedule, with the problem vehicle identified early and a standard spec across the yard, spends less on maintenance and far less on downtime than one that reacts. None of it is complicated. It is mostly deciding once, writing it down, and getting the routine work done at hours that were never productive anyway.

    Talk Through Your Fleet

    Tell us how many vehicles you run and where they park overnight, and we will work out a schedule that keeps them earning.

    πŸ“ž Call 07803 397561 Message On WhatsApp
  • ABS Light On: Is The Car Safe To Drive?

    πŸ“ž 07803 397561 βœ‰οΈ info@vdlvehiclesolutions.co.uk πŸ“ Derbyshire Β· Staffordshire Β· Cheshire Emergency Call-Outs Available
    Home β€Ί Blog
    Diagnostics & Warning Lights

    ABS Light On: Is The Car Safe To Drive?

    VDL Vehicle Solutions Β· 11 November 2026

    The short answer is that your brakes still work normally and the anti-lock system does not. What that means in practice depends entirely on whether you ever need to stop hard on a wet or icy road.

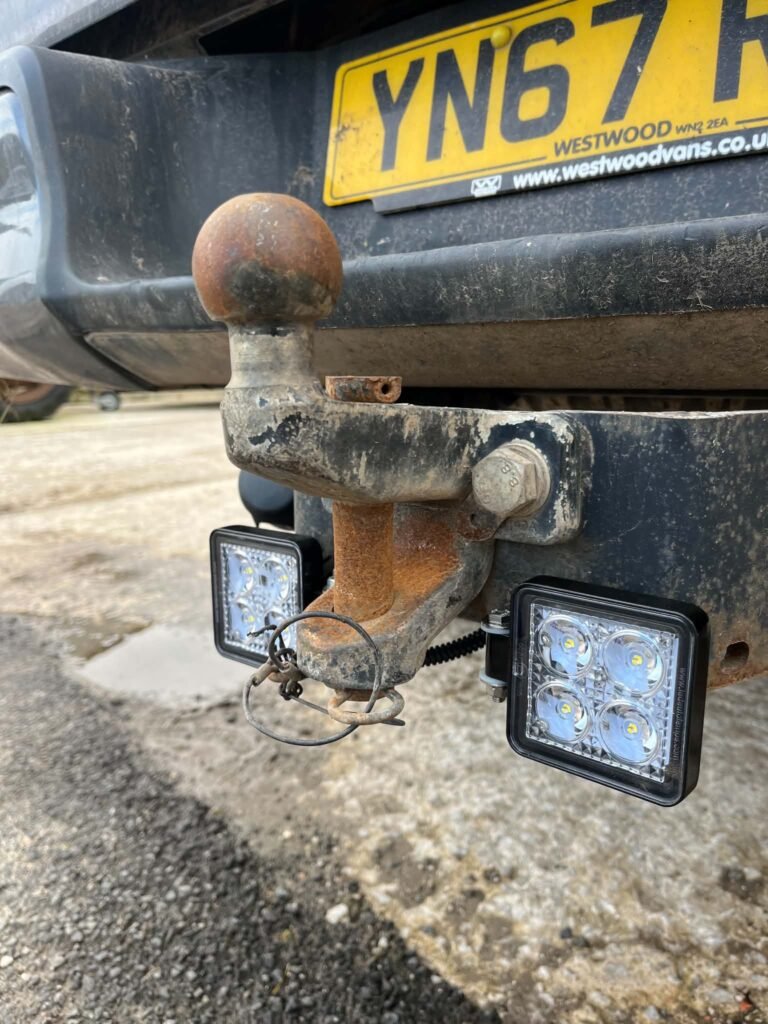
    Work lamps fitted at the rear of a vehicle near the towbar

    An ABS light causes a particular kind of worry, because it is a brake warning and people quite reasonably think the brakes have failed. They have not. The hydraulic braking system is separate from the anti-lock system, and with the ABS light on you still have full normal braking β€” pedal, master cylinder, calipers, pads, all working exactly as before.

    What you have lost is the part that stops a wheel locking. Whether that matters depends on the road, the weather and what happens in front of you.

    What You Have Lost

    ABS does one thing. It monitors how fast each wheel is turning, and if it sees a wheel slowing much faster than the car β€” about to lock and skid β€” it releases the brake pressure to that wheel briefly, then reapplies it, many times a second. That is the shuddering through the pedal people feel in an emergency stop.

    The benefits are twofold, and the second is the one people forget. A rolling tyre grips better than a sliding one, so stopping distances on a slippery surface are shorter. But more importantly, a rolling front tyre still steers and a locked one does not. Without ABS, a hard stop on a wet road can lock the fronts, and at that point the car goes wherever its momentum takes it no matter what you do with the steering wheel. Being able to brake hard and steer around something is most of what ABS buys you.

    So with the light on:

    • On a dry road, braking gently or moderately, you will notice no difference whatsoever.
    • Braking hard in the wet, on mud, on wet leaves, on ice, or on a loose or gravelled surface, the wheels can lock β€” and a locked wheel means no steering and a longer stop.
    • In a genuine emergency stop, the car behaves like a car from the 1980s, and it requires a technique most drivers have never had to use.

    It is worth being blunt about the conditions where that matters. Wet, greasy, leaf-covered lanes, frost on the descent off the tops, farm mud spread across a bend β€” the roads around here produce exactly the surfaces ABS is for, and they do it for several months of the year.

    So Can You Drive It?

    Yes, in the sense that the car is not about to fail to stop. No, in the sense that it should be treated as a fault to fix this week rather than something to live with.

    If you are going to drive it until it is sorted, drive it accordingly: bigger gaps, lower speeds in the wet, earlier and gentler braking, and no assumption that a hard stop will behave as you are used to. If the wheels do lock, the old technique is to ease off the brake enough to let them roll again and then reapply β€” but that is a skill under pressure, and it is a poor substitute for working ABS.

    There are two situations where you should stop driving it and get it looked at properly rather than carrying on. One is if the brake warning light is on as well as the ABS light, which can mean low fluid or a hydraulic fault, and that is a different and more serious problem. The other is if the ABS is activating when it should not β€” a shuddering pedal or a grinding at low speed in normal, gentle braking, which usually means the system is getting a false reading from a sensor and is releasing brake pressure when it has no business doing so. That can extend stopping distances rather than shortening them, and it needs sorting before the car goes anywhere.

    Worth knowing: the ABS light very often brings friends. On most cars the same wheel speed signals feed traction control, stability control, hill start assist, and sometimes the electronic handbrake and adaptive cruise. So one failed sensor can turn off traction control and stability control too β€” which is a much bigger loss than ABS alone, because stability control is the system that catches a slide before you know it is happening.

    The MOT Position

    An ABS warning light illuminated is an MOT failure on vehicles fitted with ABS. The tester checks the warning lights as part of the test, and a light indicating a fault in the anti-lock system means the car does not pass. The same goes for stability control lights where that system is fitted.

    Clearing the code to make the light go out for the test is a waste of a morning β€” if the fault is live, the light comes back on within a few hundred yards of driving, usually before the car gets to the test station. MOT requirements are updated from time to time, so check the current rules if the detail matters, but the general position has been consistent: a warning light for a safety system that is on is a fail.

    Common Causes, Most Likely First

    Wheel speed sensors. By a wide margin the most common cause. Each wheel has one, sitting at the hub in the worst environment on the car β€” road spray, salt, grit, heat from the brakes. They fail electrically, or they get so packed with brake dust and corrosion that the signal goes intermittent. The fault code will usually name which corner, which makes this a quick job to confirm.

    Damaged reluctor rings. The sensor reads a toothed ring, either a machined ring on the driveshaft or hub, or a magnetic encoder built into the wheel bearing seal. Those rings corrode, and the teeth flake away β€” one missing tooth is enough for the system to see a wheel doing something impossible and log a fault. A magnetic encoder ring can also be damaged by careless bearing fitting or by a magnet being put near it. Where the ring is part of the bearing, the repair is a bearing, not a sensor.

    Wiring at the hub. The sensor cable runs from a fixed point on the body to a part that steers and moves up and down, flexing every mile the car covers. Over years the insulation cracks, the wires inside break, or the connector fills with water and corrodes. This is why a fault can be intermittent, appearing over bumps or on full lock and clearing afterwards. Cables also get caught by tyre fitters and snagged on kerbs.

    Low brake fluid. Some systems flag an ABS fault when the fluid level is low, because the pump cannot work properly with air in the system. Always worth checking the reservoir first β€” and if it is low, find out where the fluid went rather than topping it up.

    The ABS module or pump. Less common, but it happens, particularly on higher-mileage cars. Faults range from a failed pump motor to dry or cracked solder joints inside the control unit. Modules can often be repaired or reconditioned rather than replaced, which makes a real difference to the cost.

    A wheel bearing or a mismatched tyre. Worth mentioning because they get missed. A badly worn bearing lets the hub move enough to upset the sensor gap. And a significantly different rolling circumference on one wheel β€” a much newer tyre, or the wrong size fitted β€” makes one wheel genuinely turn at a different rate, which the system reads as a fault.

    Why Salt And These Roads Are Hard On Sensors

    The routes over the tops are gritted early and heavily, and salt does two things that matter here. It accelerates corrosion on everything steel, and it conducts, so it finds its way into connectors and creates paths for current where there should not be any.

    A sensor bolted into a steel hub can seize in solid, so what should be a straightforward part swap becomes an exercise in extracting a corroded sensor without breaking it off in the hub. Reluctor rings corrode from the outside in. Connectors at the wheel arch fill with salty water and corrode from the inside.

    Add to that the state of the roads β€” potholes, broken edges, gravel washed off the fields β€” and the sensor cables take a beating as well. It is not a coincidence that ABS faults show up most in late winter and early spring.

    How It Gets Diagnosed

    The right first step is to read the codes, because the system generally tells you which corner it is unhappy about. Beyond that, a proper diagnosis means looking at live data β€” watching all four wheel speed readings while the car is driven or the wheels are turned, so a sensor that reads correctly at rest and drops out under movement is caught. That is how intermittent faults get found, and it is why code reading on its own is not always enough.

    From there it is a physical check of the sensor, its cable and connector, the reluctor ring, and the fluid level, plus resistance and output testing on the sensor itself. All of it can be done where the vehicle is standing, so a mobile diagnostic visit usually gets you an answer and, more often than not, the repair in the same visit β€” most sensors and cables are replaceable on a driveway. If the outcome is a wheel bearing with an integrated encoder ring, or work on the module, that gets booked in with us to do properly.

    What is not worth doing is clearing the light and hoping. The fault is logged because something is genuinely out of specification, and the systems that switch off alongside ABS are the ones you would most want working on a wet descent in December.

    ABS Light On? Get It Read Properly

    We will read the codes, check live wheel speed data and tell you exactly which corner is at fault.

    πŸ“ž Call 07803 397561 Message On WhatsApp
  • Humming, Knocking, Rumbling: Diagnosing Car Noises

    πŸ“ž 07803 397561 βœ‰οΈ info@vdlvehiclesolutions.co.uk πŸ“ Derbyshire Β· Staffordshire Β· Cheshire Emergency Call-Outs Available
    Home β€Ί Blog
    Servicing & Repairs

    Humming, Knocking, Rumbling: Diagnosing Car Noises

    VDL Vehicle Solutions Β· 9 November 2026

    Half the work in tracking down a noise is deciding what makes it change. Get that right and you have usually narrowed it to two or three possibilities before anyone jacks the car up.

    Mobile mechanic van parked up at a roadside job

    Noises are hard to diagnose from a description because everybody describes them differently. One person’s rumble is another person’s drone. What is much more reliable than the sound itself is the behaviour of the sound β€” what makes it louder, what makes it go away, whether it follows road speed or engine speed.

    That is the useful question, and it splits noises into four groups. Working out which group yours is in does most of the diagnostic work.

    Group One: It Changes With Road Speed

    The noise rises and falls with how fast the car is going, regardless of what gear you are in or what the engine is doing. Coast in neutral at the same speed and it is still there. That points at something rotating with the wheels β€” bearings, tyres, driveshafts, brakes.

    Wheel bearing. The classic is a hum or drone that comes in around 30 to 40mph and gets louder with speed, often described as sounding like driving on a rough surface when the road is smooth. The giveaway is what happens on a curve: load a bearing and it gets worse, unload it and it improves. On a long left-hand bend, weight transfers to the right-hand wheels, so a right-hand bearing gets louder going left and quieter going right. A gentle sweeping curve on a dual carriageway is the ideal place to test it. A badly worn bearing eventually growls at low speed too, and you may feel a vibration through the floor or the seat.

    Tyres. Tyre noise also follows road speed and can sound very like a bearing, which catches people out. Unevenly worn tyres, particularly with feathered or scalloped wear, produce a drone that changes with road surface β€” it disappears on fresh tarmac and comes back on a coarse surface, whereas a bearing does not care what the road is made of. Swapping wheels front to rear is a crude but effective way to find out.

    Brakes. A cyclical scrape or light rubbing that slows with the car, sometimes with a squeal, usually means a pad worn to its backing, a corroded disc, or a pad binding in its carrier. A rhythmic noise that comes round once per wheel revolution is a disc problem rather than a bearing.

    Group Two: It Changes With Engine Speed

    The noise follows the rev counter. Rev it in neutral and it is there; coast at speed with the engine idling and it is not. That means something driven by the engine β€” the belt, an ancillary, the exhaust, or the engine itself.

    Belt squeal. A sharp squeal on a cold start that eases as things warm through is nearly always the auxiliary belt β€” glazed, perished, or a tensioner that has lost its grip. It is often worse in damp weather and when the heater blower or air conditioning loads the belt. Cheap to sort, and worth sorting: the belt drives the alternator and the water pump, and a snapped one leaves you with no charging and no cooling.

    Exhaust blow. A puffing, rasping or blowing noise that rises with revs and is loudest under load, often with a deeper drone in the cabin. A blow at a joint or a failed gasket usually sounds tinny and tapping at idle; a hole further back sounds boomy. Rusted-through sections are common on cars that see salted roads, and it is an MOT failure as well as a noise.

    A rhythmic tapping that follows revs can be a number of things β€” valve clearances, a noisy injector, a heat shield vibrating at a particular engine speed. Heat shields are worth mentioning because they cause a lot of alarming rattles for nothing.

    A deep knock or rumble from low in the engine that follows revs and gets worse under load is the one to stop for. That is bottom-end territory and it does not improve by being driven.

    Group Three: It Changes With Steering

    The noise appears when you turn, and the amount of lock matters.

    CV joint. A rhythmic clicking or knocking on full or near-full lock, most obvious pulling out of a junction or manoeuvring in a car park, and usually only in one direction. It is a rapid tick-tick-tick that speeds up as the wheel turns faster. Have a look at the rubber CV boot behind the wheel while you are there β€” a split boot slinging grease around the inside of the arch is what killed the joint, and catching a split boot early saves the joint entirely.

    Power steering. A groan or whine when turning, worst at low speed and full lock. On hydraulic systems that is often low fluid or a tired pump; on electric systems it is more likely the motor or its mounting.

    Top mount or strut bearing. A creak, clonk or graunching noise as you turn the wheel while stationary or nearly so, felt through the steering wheel as much as heard.

    Group Four: It Happens Over Bumps

    The noise is tied to the road surface, not to speed or revs. Smooth road, silence. Rough lane, a clatter. This is suspension.

    Anti-roll bar drop links are the single most common cause, and they are worth knowing about because the noise they make is out of all proportion to the part. A worn drop link produces a light knocking or rattling over small, sharp bumps β€” cats’ eyes, drain covers, patched tarmac β€” and it is often more noticeable at low speed than at high. They are inexpensive and quick to change.

    A heavier clonk over larger bumps points more at worn bushes, a top mount, or a ball joint. A creaking as the suspension moves, particularly reversing off a driveway or over a speed hump, is usually a dry or perished bush.

    A rattle from underneath that comes and goes is very often an exhaust mounting rubber that has perished, letting the system knock against the body β€” another cheap fix that sounds expensive.

    Worth knowing: the single most useful test you can do yourself costs nothing. Get up to a steady speed, put it in neutral, and lift off. If the noise carries on unchanged, it follows road speed β€” bearings, tyres, brakes, driveshafts. If it drops away with the revs, it follows engine speed β€” belt, exhaust, ancillaries, engine. That one observation eliminates half the possibilities.

    What Is Urgent And What Can Wait

    Not every noise is a reason to stop driving, and it helps to know which is which.

    Stop now and do not drive it:

    • A deep knocking from the engine that follows revs, especially with low oil pressure or a warning light.
    • Any grinding or metallic scraping when braking, or a noise accompanied by a soft or long-travelling brake pedal.
    • A loud clonk with vague or wandering steering, or a noise that arrived along with a change in how the car steers.
    • A screeching belt that then goes quiet, with the battery light on β€” the belt has gone and you have no charging or water pump.
    • Anything accompanied by a burning smell, smoke, or a temperature gauge climbing.

    Book it in soon, keep the mileage down: a humming wheel bearing, a clicking CV joint, an exhaust blow, brakes that squeal without grinding. These are deteriorating and will get more expensive β€” a bearing that is allowed to go long enough can damage the hub, a CV joint can fail completely and leave you without drive β€” but they are not usually an immediate danger over a few days.

    Mention it at the next service: a knocking drop link, a creaking bush, a rattling heat shield or exhaust mounting, a belt squeal that only appears on the first cold start. Annoying rather than dangerous, and cheap to sort when the car is already up.

    Describing It Well Saves You Money

    Diagnostic time is time, and a good description shortens it. When you ring, the things worth having ready are:

    1. What makes it change β€” road speed, engine speed, steering, bumps, braking. This is the most valuable single piece of information.
    2. Where it seems to come from β€” front or back, left or right, and whether you feel it as well as hear it.
    3. When it started, and whether anything happened at the time: a pothole, a kerb, a cold snap, a recent repair.
    4. Whether it is getting worse, and how quickly.
    5. What it does not do β€” “it never does it in the dry”, “it goes away above 50”, “only when the car is cold”. Negatives narrow things down as effectively as positives.

    If you can, record it on your phone from inside the car while a passenger drives, and say out loud what you are doing as it happens. A ten-second clip with “that’s at about 40, coming into a left-hander” is worth more than a paragraph of description.

    Being able to reproduce the noise on demand is the other thing that helps enormously. A noise that only happens once a fortnight is genuinely hard to find; a noise that appears every time you take the same corner is straightforward. We can come out and drive it with you on the road where it happens, which is often how a diagnosis and repair gets sorted in one visit rather than two. Anything that needs the car properly raised gets booked in with us.

    Got A Noise You Cannot Place?

    Tell us what makes it change and we will come out, drive it with you, and find it.

    πŸ“ž Call 07803 397561 Message On WhatsApp
  • Tyres: Why 3mm Is The Real Limit, Not 1.6mm

    πŸ“ž 07803 397561 βœ‰οΈ info@vdlvehiclesolutions.co.uk πŸ“ Derbyshire Β· Staffordshire Β· Cheshire Emergency Call-Outs Available
    Home β€Ί Blog
    MOT & Roadworthiness

    Tyres: Why 3mm Is The Real Limit, Not 1.6mm

    VDL Vehicle Solutions Β· 6 November 2026

    The legal minimum is the point at which a tyre becomes an offence, not the point at which it stops working. Those are two very different numbers, and the gap between them is where most of the grip lives.

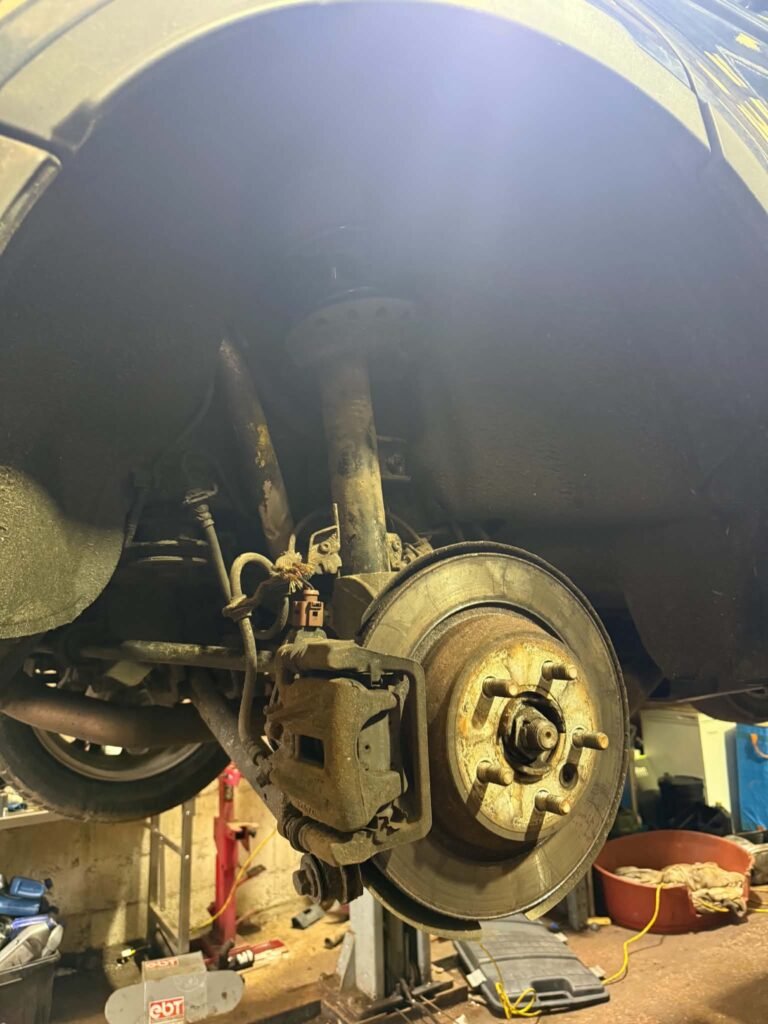
    Brake disc and caliper exposed with the wheel removed

    Tread depth is the one thing on a car that people treat as a pass or fail. Above 1.6mm it is legal, below it is not, and that framing quietly suggests 1.7mm is fine. It is not fine. It is legal, which is a statement about enforcement rather than about stopping distance.

    The number worth working to is 3mm, and it is worth understanding why rather than taking it as a rule.

    What The Tread Is Actually For

    On a dry road, tread does very little β€” a slick has more rubber in contact and grips better, which is why racing tyres have no pattern. Tread exists for one job: getting water out from under the tyre.

    Driving through standing water, the tyre has to displace it, and the only route for that water is through the grooves. A deep groove has volume to move water into. A shallow one does not, and once the grooves cannot take the water away fast enough, a wedge of water builds under the leading edge of the contact patch and lifts the tyre off the road.

    So tread depth is a measure of water capacity, and it falls away as the tyre wears. That is why nothing changes in the dry as a tyre goes down, and why the wet performance drops off so noticeably.

    Where 3mm Comes From

    Wet braking distance does not decline evenly as tread wears. It holds up reasonably well from new down to around 3mm, and then it deteriorates sharply through the last part of the tyre’s life. The drop between 3mm and 1.6mm is much larger than the drop between 8mm and 3mm, even though the amount of rubber lost is smaller.

    Resistance to aquaplaning behaves the same way, only worse β€” the speed at which a tyre will start to aquaplane through standing water falls off steeply once tread gets shallow. A tyre at 2mm in heavy rain on a rutted A-road is a genuinely different vehicle to drive.

    Hence the sensible working limit: change at around 3mm rather than running to the legal figure, and if you are approaching winter with tyres near the limit, change them before rather than after. It costs the same money slightly sooner and buys the grip in the months you need it.

    Checking It Properly

    The 20p test is fine as a rough screen β€” insert a 20p coin into a main groove, and if the outer band of the coin is visible, the tread is getting close to the legal limit. What it does not do is tell you when you are at 3mm, so a cheap tread depth gauge is a better buy.

    Two things people miss when checking:

    • Check across the width, not just in the middle. The legal requirement applies across the central three-quarters of the tread and around the whole circumference. A tyre can be legal in the middle and bald on the inner shoulder, which is both an MOT failure and a sign of something else being wrong.
    • Check all four, and the spare. Wear is rarely even between axles, and a spare that has sat in the boot for eight years may be legal on tread and useless on age.

    Tread wear indicators β€” the small raised bars in the base of the grooves β€” sit at the legal minimum. If the tread is level with them, the tyre is finished and has been for a while.

    Age Matters As Much As Tread

    Rubber is a perishable material. It hardens with age and with exposure to heat, sunlight and ozone, whether the tyre is being used or not, and a hard tyre grips badly β€” particularly in the cold, where a modern compound relies on staying flexible to work.

    That is why a five- or six-year-old tyre with plenty of tread can be worse on a frosty morning than a newer tyre with less. It is also why caravan and trailer tyres fail: they have full tread and have been sitting in the sun for a decade.

    The age is on the sidewall as a four-digit code, usually in an oval. The first two digits are the week, the last two the year β€” so 3223 means the thirty-second week of 2023. It is worth looking at, especially on a used car, where a bargain can turn out to be wearing tyres older than the last two owners.

    There is no MOT age limit for tyres on ordinary cars, though there are rules for some larger and passenger-carrying vehicles, and those rules change β€” so check the current position rather than assume. As a practical matter, a tyre approaching ten years old should be replaced regardless of tread, and one that is cracking or crazing on the sidewall should be replaced now.

    Worth knowing: look for fine cracks in the sidewall and in the base of the grooves. That crazing is the rubber perishing, and it is a better indicator of a tyre being past it than tread depth or the date code alone. Once a sidewall is cracked, the tyre is not safe whatever the tread says.

    Uneven Wear Is A Message, Not A Tyre Problem

    A tyre wearing unevenly is telling you something about the car. Replacing it without fixing the cause means doing it again in a few thousand miles.

    • Worn on the inner edge only β€” usually tracking or camber out of adjustment, often after hitting a kerb or a pothole. Extremely common, and the potholes around here do not help.
    • Worn on both outer edges β€” persistent underinflation. Check pressures monthly and check them cold.
    • Worn in a band down the centre β€” overinflation.
    • Feathered, with one side of each tread block sharper than the other β€” toe misalignment, and you can often feel it with a palm run across the tread.
    • Patchy or scalloped wear β€” worn dampers or a bush letting the wheel move about, so the tyre is not held steadily on the road.

    Any of these is worth a look at the suspension and a check of the alignment. A wheel alignment after new tyres is money well spent if the old ones wore unevenly, and a suspension and steering inspection is the way to find the bush or damper causing it.

    Part-Worn Tyres

    Part-worns look like a saving and rarely are. Consider what you are buying: a tyre with an unknown history, possibly at 4mm, at a price that is a decent fraction of a new budget tyre β€” so you are paying a large share of the cost for a small share of the life. On cost per millimetre of usable tread, new tyres are almost always cheaper.

    Then there is what you cannot see. A tyre may have been run flat, kerbed hard, punctured and repaired badly, or stored outside for years. Internal damage is invisible from the outside and is exactly what causes a sudden failure at speed.

    There are legal requirements that part-worns are supposed to meet before sale, including a minimum tread depth above the legal limit and being marked as part-worn, and surveys of the trade have repeatedly found sellers who do not comply. If you are going to buy them, check the markings and the date code and look inside the tyre β€” but for most people a new budget tyre from a known maker is the better decision.

    All-Season Or Winter Tyres Up Here?

    Summer tyres lose flexibility below about seven degrees, which in the High Peak covers a great deal of the year on an early morning. Cold-weather compounds stay pliable and have tread patterns that bite into snow and clear slush.

    Whether they are worth it is genuinely a question of where you live and what you have to do:

    • Full winter tyres make sense if you are up in the hill villages, you have to get out every morning whatever the weather, and you are willing to store and swap a second set. On snow and ice the difference is not marginal, it is the difference between going and not going.
    • All-season tyres are the sensible compromise for most people around Buxton, Chapel, Whaley Bridge and the villages above the A6 β€” noticeably better than summer tyres in the cold and the wet, no swapping, no second set of wheels, a small penalty in the dry.
    • Good summer tyres with plenty of tread are adequate if you are lower down and mostly on gritted main roads β€” Crewe, Stafford, Derby, the Cheshire plain.

    Whatever you fit, fit them in fours, or at minimum as a matched pair on the same axle. Mixing tyre types across an axle gives you different grip on each side of the car, which is worse than either tyre would be on its own.

    The Short Version

    Change at 3mm, not 1.6mm. Check the date code as well as the tread. Look at the inner edge, not just the middle. Treat uneven wear as a suspension or alignment fault rather than a tyre to replace. And if your tyres are marginal going into November, do it now β€” the months when grip matters most are the months you are about to drive through.

    Want Your Tyres And Suspension Checked?

    We will measure all four properly, check the date codes, and look for what is causing uneven wear.

    πŸ“ž Call 07803 397561 Message On WhatsApp
  • Alternator Or Battery? Telling Which One Has Failed

    πŸ“ž 07803 397561 βœ‰οΈ info@vdlvehiclesolutions.co.uk πŸ“ Derbyshire Β· Staffordshire Β· Cheshire Emergency Call-Outs Available
    Home β€Ί Blog
    Diagnostics & Warning Lights

    Alternator Or Battery? Telling Which One Has Failed

    VDL Vehicle Solutions Β· 4 November 2026

    These two faults feel almost identical from the driver’s seat, which is why so many people buy a battery they did not need. The symptoms do separate them, if you know what to notice.

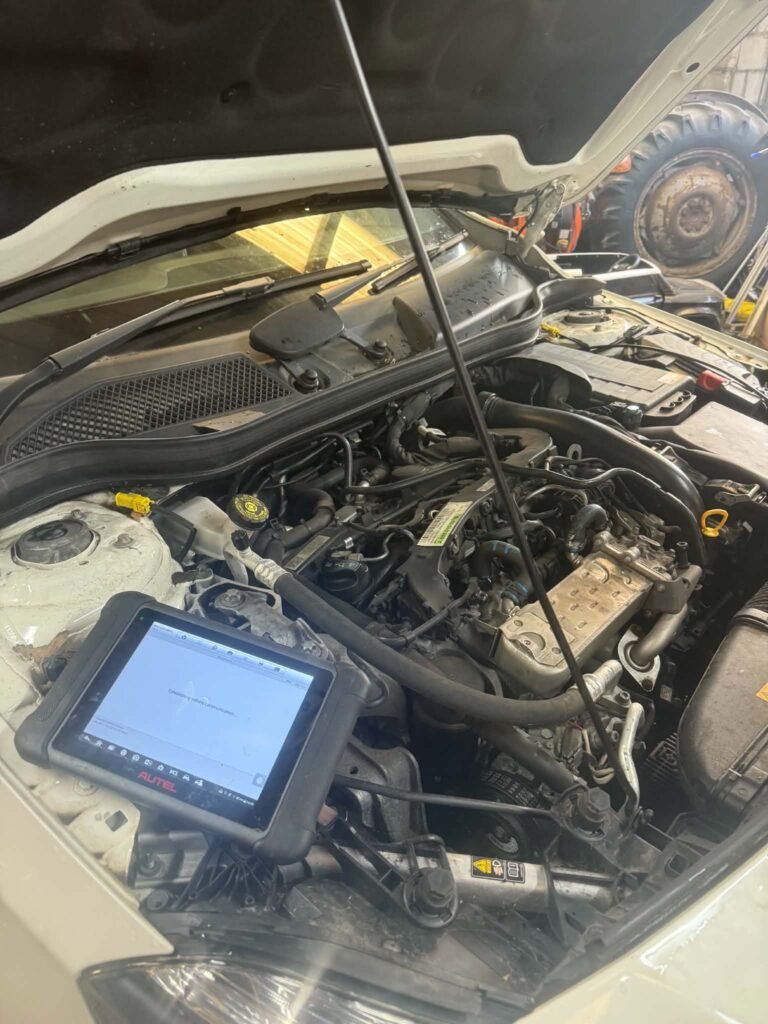
    Diagnostic scan tool connected to a vehicle

    The two components do different jobs. The battery stores enough energy to turn the engine over and to run things briefly with the engine off. The alternator makes electricity once the engine is running, powers everything the car needs, and puts back what starting took out.

    Because they work as a pair, either failing produces the same headline symptom β€” a car that will not start. Beyond that headline, they behave quite differently, and the differences are easy enough to spot that you can usually work out which one you are dealing with before anyone opens the bonnet.

    What A Failing Battery Looks Like

    A battery losing capacity fails on starting, and it fails in the cold and after standing.

    • Slow, laboured cranking, especially on the first start of a cold morning. The engine turns but sounds like it is struggling against something.
    • It starts fine at lunchtime and refuses at seven in the morning. Cold reduces what a battery can deliver and thickens the oil the engine has to turn.
    • Fine after a run, dead after standing for a few days. A weak battery self-discharges faster and has no reserve.
    • Dashboard lights dimming noticeably while cranking, then the car running perfectly once started.
    • A clicking from the starter with no crank at all, or everything on the dash resetting when you turn the key.
    • Stop-start refusing to work. Many cars disable stop-start when the battery is not healthy enough, and it is often the first sign, well before starting becomes a problem.

    The key pattern with a battery: once it is running, everything is normal. The car drives properly, nothing dims, no warning lights, no odd behaviour. All the trouble is at the point of starting.

    What A Failing Alternator Looks Like

    An alternator fails on running, and the symptoms appear while you are driving.

    • The battery warning light on with the engine running. This is the headline symptom and it is worth being clear about what it means.
    • Lights dimming at idle and brightening when you rev, or headlights pulsing with engine speed.
    • Dashboard lights coming on in odd combinations as voltage falls β€” ABS, traction control, power steering β€” because modules start complaining about supply voltage rather than about themselves.
    • The heater blower slowing down, wipers getting sluggish, the radio cutting out or resetting.
    • A whine or growl that rises with engine speed, from worn alternator bearings, or a squeal from a slipping belt.
    • A burning smell β€” hot insulation or a hot belt.
    • The car dying while being driven, which a battery fault does not do. If the alternator stops charging, the battery runs the whole car until it is flat, and then everything stops.

    How long you get between the light coming on and the car stopping depends entirely on the battery and what is switched on. It might be an hour, it might be ten minutes on a wet night with headlights, wipers and heater going. Treat it as short.

    Worth knowing: the battery-shaped warning light means the charging system is not charging. It is not a battery condition light. If it comes on while driving, the most likely causes are the alternator, its belt, or the wiring between it and the battery β€” replacing the battery will not put it out.

    The Jump Start Test

    This is the most useful roadside test there is, and it is genuinely decisive.

    Jump the car, then disconnect the leads and see what happens next.

    If it runs on happily β€” idles steadily, lights normal, no warning light β€” the alternator is working and the problem is the battery, or something that drained it, or a bad connection.

    If it dies within moments of the leads coming off, or the battery light stays on and the car soon stalls, the alternator is not producing. The car was running on the donor vehicle, not on itself.

    That single observation separates the two faults in about thirty seconds, and it is why it is worth phoning before buying parts. Two related patterns are also worth knowing: a car that will not crank at all but has bright, steady dashboard lights is often a starter or a connection rather than a battery; and a car that cranks normally and simply will not fire is not an electrical supply problem at all.

    Voltage, In General Terms

    You do not need a workshop to take a meaningful voltage reading β€” a basic multimeter across the battery terminals will do it β€” and the broad picture is easy to interpret.

    With the engine off and the car having stood for a while, a healthy fully charged battery sits a little over 12.6 volts. Around 12.4 is partly discharged. Near 12.0 it is largely flat, and something well below 12 has either been drained hard or has a failed cell.

    With the engine running, the alternator should raise the system voltage clearly above the resting figure β€” typically somewhere in the 13.5 to 14.5 volt range on most vehicles. If the running voltage is barely above the resting voltage, it is not charging. If it is well above that range, the regulator has failed the other way, which is worse, because overcharging cooks a battery and can damage electronics.

    Two caveats. Many modern cars use smart charging and deliberately vary the voltage depending on battery state, temperature and load β€” so a reading that looks low on a car with a battery sensor is not automatically a fault, and these systems need to be interpreted with data from the car rather than a meter alone. And surface charge makes a battery that has just been driven read higher than it really is, so a resting reading means resting, not two minutes after switching off.

    Why New Batteries Get Wasted

    The common story: car will not start, a battery gets fitted, it is fine for a fortnight, and then it is flat again. Now there are two batteries and the original fault is still there.

    The reasons a battery keeps going flat when the battery is not the problem:

    1. The alternator is not charging properly. Sometimes not at all, sometimes charging weakly enough that short journeys never keep up.
    2. A parasitic drain. Something drawing current with the car locked β€” a module not going to sleep, a boot or glovebox light, an aftermarket alarm, a tracker or dashcam wired to a permanent live without a cutoff, a failing relay. These are found by measuring current draw over time, not by guessing.
    3. Bad connections. A corroded terminal, a loose clamp, or a poor earth strap between engine and body will mimic both faults. It is the first thing worth checking and costs nothing.
    4. Use pattern. Short journeys in winter, with heated screens and seats, can take more out of a battery than a few miles puts back. Nothing is broken; the car is being used in a way that keeps it undercharged.
    5. The wrong battery, or one not registered. Many cars with stop-start need an AGM or EFB battery, and many need the new battery coded to the car so the charging strategy suits it. Fit a standard battery, or fit the right one without registering it, and it will be charged incorrectly and die early.

    That last point catches a lot of people out on cars from the last decade or so, and it is not optional on the vehicles that require it.

    Testing It Properly

    Doing this properly means testing the system, not swapping parts. In practice that is: a load or conductance test on the battery to see what capacity is actually left; a charging test with the engine running and then with a realistic load applied, because some alternators cope at idle and fall over with lights and blower on; a voltage-drop check across the main cables and earths; a parasitic drain measurement if the complaint is going flat while parked; and reading the car’s own data on battery state and charging strategy where it has a sensor.

    All of that can be done where the vehicle is standing, which is why it suits a mobile diagnostic and roadside visit β€” you get an answer before any parts are bought. If the outcome is an alternator, that is usually a job we can do on site too, and if a car needs more than that it gets booked in with us.

    The cost of testing first is small. The cost of guessing is a battery you did not need and an alternator you still have to pay for.

    Not Sure Which One It Is?

    We will test the battery and the charging system on site and tell you what actually needs replacing.

    πŸ“ž Call 07803 397561 Message On WhatsApp
  • Antifreeze: Strength Matters More Than Level

    πŸ“ž 07803 397561 βœ‰οΈ info@vdlvehiclesolutions.co.uk πŸ“ Derbyshire Β· Staffordshire Β· Cheshire Emergency Call-Outs Available
    Home β€Ί Blog
    Winter & Seasonal

    Antifreeze: Strength Matters More Than Level

    VDL Vehicle Solutions Β· 2 November 2026

    A coolant bottle sitting between the marks tells you the system is full. It tells you nothing about whether what is in there will still be liquid at minus eight on the tops.

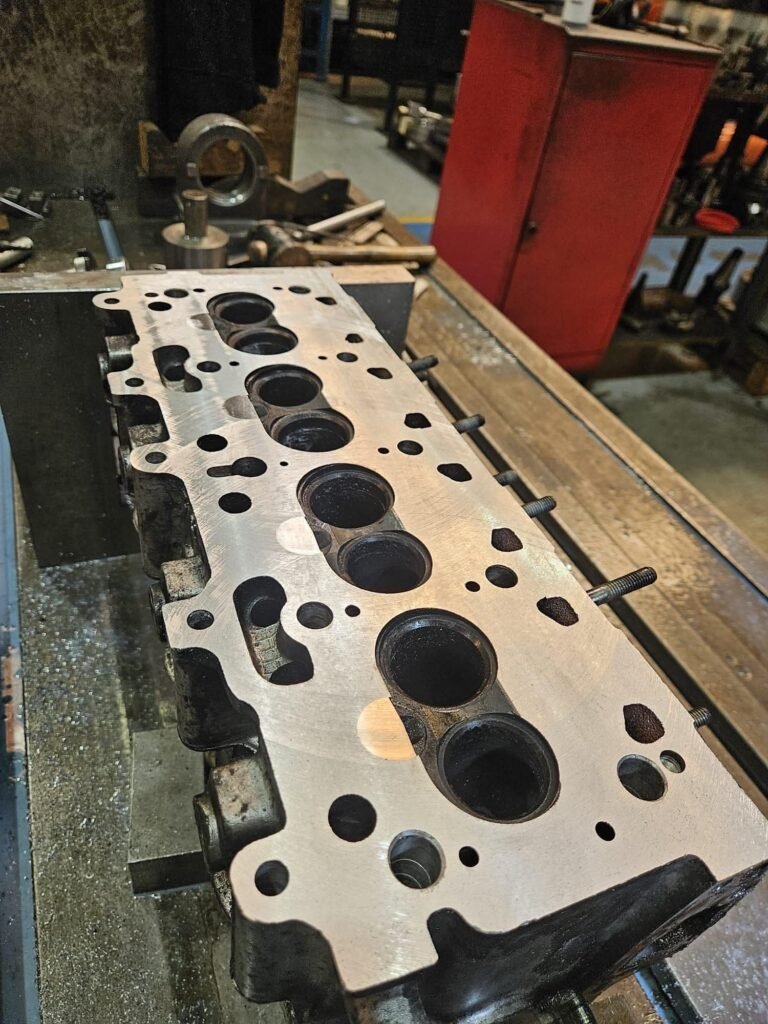
    Cylinder head removed and sitting on the bench

    Coolant is the fluid nobody thinks about until something expensive happens. Oil gets changed, brakes get inspected, tyres get looked at β€” coolant gets glanced at through the side of a plastic bottle once a year and forgotten. And the one thing that glance cannot tell you is the only thing that matters in December.

    Level and concentration are two different measurements. A system can be perfectly full of something that freezes at minus three.

    Level Versus Concentration

    Level is how much fluid is in the system. It should sit between the marks on the expansion tank when the engine is cold, and if it keeps dropping you have a leak that needs finding rather than a bottle you need to keep topping up.

    Concentration is the ratio of antifreeze to water in that fluid. Typically you want somewhere around a 50:50 mix, which is good for protection well below anything the UK weather will produce. At 40 per cent you still have reasonable protection. By the time you are down near 25 or 30 per cent, you are protected against a mild frost and nothing more β€” and the car will look completely normal while that is true.

    Nothing on the dashboard measures concentration. The car has no idea. It is only found by testing.

    How Top-Ups Quietly Ruin It

    Here is the sequence that gets most cars into trouble, and it is entirely well-intentioned.

    The level drops slightly over a year, because a small weep at a hose clip or a slow loss past a pump seal is normal ageing. Somebody notices, sees the bottle is low, and tops it up with water β€” because water is what is to hand, and because it is only a bit. Next year the same. The year after, the same again.

    Each top-up dilutes what is already in there. Three or four topping-ups with plain water across a few years, plus whatever was lost as a pressure-cap release of mostly water vapour, and a system that left the factory at 50 per cent can be down at 30 without anyone doing anything careless.

    The fix is simple: top up with pre-mixed coolant of the correct type, or with concentrate diluted properly with deionised water. Never with water from the tap as a habit β€” once in an emergency to get home is a reasonable trade, but it needs correcting afterwards, not forgetting.

    What Happens When It Freezes

    Water expands as it freezes, and it does not care what is in the way. In a cooling system, the damage goes in roughly this order of cost:

    • Split hoses. The cheapest outcome, and the one you want if any of it is going to happen. A hose bursts, you lose all the coolant, the car overheats the moment you drive it.
    • A cracked radiator or expansion tank. Plastic end tanks split readily when ice forms inside them.
    • The heater matrix. Buried in the dashboard, so the part may be modest and the labour is anything but. A leaking matrix also means coolant on the carpet and a windscreen that mists up and will not clear.
    • A cracked block or head. Ice forming in the water jackets can crack cast iron and aluminium. On most cars this is the point at which the repair is worth more than the car.

    Cars can also freeze solid without breaking anything and simply overheat on the way to work, because the coolant is a block of slush that will not circulate while the engine is producing heat. Either way the ending is not good.

    This is not a theoretical risk at altitude. The villages above the A6, the moorland roads, anywhere that sits in a frost hollow β€” those places see genuinely cold nights, repeatedly, and a car parked outside all night is at ambient temperature by morning.

    Testing It Takes Seconds

    A refractometer is the right tool. A couple of drops of coolant on the plate, hold it up to the light, and read the freezing point off the scale directly. It is quick, it is accurate, and it works on all the common coolant chemistries as long as you read the correct scale.

    The cheap floating-ball hydrometers sold in accessory shops are better than nothing but are crude, temperature-sensitive and easy to misread. If you are making a decision about whether a car is safe for winter, use a refractometer or have someone test it who has one.

    We test coolant strength as part of a service and pre-winter check, because it takes moments and it is the sort of thing that only ever gets found by looking.

    Worth knowing: a refractometer reads the freeze point, not the condition of the coolant. Fluid that tests strong can still be chemically exhausted β€” brown, cloudy, or with a sludge in the expansion tank. If it looks wrong, it needs changing regardless of what the scale says.

    Antifreeze Does Three Jobs, Not One

    This is the part that surprises people, and it is why coolant needs changing on cars that live somewhere mild and have never been near a frost.

    It lowers the freezing point. The obvious job, and the one it is named after.

    It raises the boiling point and carries heat. A properly mixed coolant under system pressure is far less likely to boil locally at a hot spot in the head, which is where damage starts.

    It prevents corrosion and lubricates. This is the one that matters year-round. A modern engine has aluminium, cast iron, steel, brass, solder and rubber all sharing one fluid, and without inhibitors they corrode β€” and they corrode each other, galvanically, faster than they would alone. The inhibitor package also protects and lubricates the water pump seal.

    Those inhibitors deplete. They get used up doing their job, and after a number of years they are simply gone. The fluid still stops freezing, so it passes the obvious test, while internally the radiator is silting up, the pump seal is wearing, the heater matrix is narrowing, and the thermostat is gumming up. That is how a car ends up with a corroded-through radiator and an overheating problem in July.

    So coolant has a change interval for reasons that have nothing to do with winter, and skipping it is a slow, invisible expense.

    Types, And Why Mixing Them Is A Bad Idea

    Coolants are grouped by their inhibitor chemistry, and the groups are not interchangeable:

    • IAT β€” the traditional blue or green inorganic type, short life, mostly found on older vehicles.
    • OAT β€” organic acid technology, long life, usually red, pink or orange depending on the manufacturer.
    • HOAT β€” a hybrid, with both organic and some inorganic inhibitors, common on a lot of European vehicles, often yellow or turquoise.

    Mix an OAT with an IAT and the additive packages can react, dropping out of solution as a gel or sludge that blocks the narrow passages in a radiator and heater matrix. You end up with a system that is full, tests fine for freeze point, and does not cool properly because the passages are silting up.

    Two practical rules. Colour is not a specification β€” different manufacturers dye different chemistries the same colours, so never choose coolant by matching the colour in the bottle. And use the specification in the handbook, or the manufacturer’s own approval, rather than a bottle labelled as suitable for everything. If you genuinely do not know what is in a system, the right answer is a flush and refill with the correct type, not a top-up and hope.

    Change Intervals

    Intervals vary enormously by vehicle and coolant type, from a couple of years on older IAT systems to long-life schedules measured in many years or high mileage. The handbook is the authority for your car, and it is worth actually looking rather than assuming a modern car never needs it.

    Beyond the schedule, change it if: the fluid is brown, rusty or cloudy, there is sludge or oil in the expansion tank, it has been topped up repeatedly with water, the system has been opened for a repair, or nobody can tell you when it was last done. A coolant change on a system that has been neglected is one of the better-value jobs on a car, because it heads off a radiator, a pump and a matrix all at once.

    And while the system is being looked at, the hoses and clips are worth ten seconds of attention each. A hose that has gone hard, soft or spongy near a clip is the one that lets go on the coldest morning of the year, which is a roadside call-out that a minute in a warm garage would have prevented.

    Get The Coolant Tested Before The Frosts

    We will check strength, condition and hoses at your home or workplace and tell you what actually needs doing.

    πŸ“ž Call 07803 397561 Message On WhatsApp
  • Choosing A Dashcam: What Matters And What Does Not

    πŸ“ž 07803 397561 βœ‰οΈ info@vdlvehiclesolutions.co.uk πŸ“ Derbyshire Β· Staffordshire Β· Cheshire Emergency Call-Outs Available
    Home β€Ί Blog
    Lighting & Dashcams

    Choosing A Dashcam: What Matters And What Does Not

    VDL Vehicle Solutions Β· 30 October 2026

    Dashcams are sold on resolution figures, and resolution is one of the least useful numbers on the box. Here is what actually determines whether your footage is worth anything when you need it.

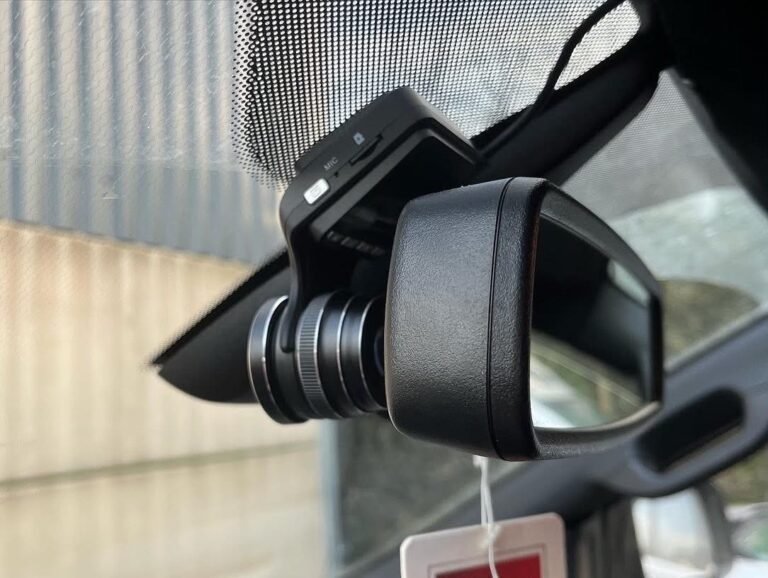
    Dashcam fitted neatly behind the rear view mirror

    The point of a dashcam is a single frame: the one that shows a registration plate, or shows clearly who crossed the line. Everything about choosing one should work backwards from that. A camera that produces beautiful footage on a sunny afternoon and useless mush at half past five in November has failed at the job, however good the spec sheet looks.

    That is worth keeping in mind, because almost all the marketing is about numbers that do not predict night performance at all.

    Resolution Versus Sensor Quality

    Resolution tells you how many pixels there are. It says nothing about how much light each of those pixels gathers, and in a car, light is the constraint.

    A 4K camera with a small, cheap sensor will often produce worse usable footage at night than a 1080p camera with a large, good sensor, because the higher-resolution one is dividing the same amount of light into more pixels and then leaning on noise reduction to hide the result. Noise reduction is what smears a number plate into a grey rectangle.

    What to look at instead:

    • The sensor, if the maker names it. Cameras that use well-regarded sensors tend to say so. Ones that do not name a sensor are usually not proud of it.
    • Aperture β€” a lower f-number lets in more light. f/1.6 will beat f/2.4 in the dark, all else equal.
    • Actual night footage. Find real samples recorded at night in rain, not the manufacturer’s showreel. This is the only test that matters.
    • Frame rate. 30fps is fine for most things; 60fps helps freeze a plate on a fast-moving car, but only if the sensor can gather enough light at the shorter exposure, which at night it often cannot.

    1440p with a good sensor is the sweet spot for most people. It gives meaningfully more detail than 1080p without the file sizes and heat of 4K, and the better cameras at that resolution tend to have the better optics.

    Field Of View: Wider Is Not Better

    A very wide lens β€” 170 degrees and up β€” catches more of what happened either side, which sounds ideal. The cost is that everything in the middle distance gets smaller and the edges get distorted, so the plate of the car that pulled out is further away in the frame and harder to read.

    Something in the region of 140 to 160 degrees is the usual compromise: wide enough to cover both pavements at a junction, tight enough that the car in front is recorded at useful size. If you mostly drive rural A-roads and lanes, err towards the narrower end β€” the incidents that matter there happen ahead of you, not at the kerb.

    Front Only, Or Front And Rear?

    Front-only covers the majority of incidents. But a large share of the claims where footage decides the outcome are rear-end shunts, and the disputed version of events is almost always about whether you stopped suddenly or the other driver was too close. A rear camera settles that immediately.

    For anyone doing a lot of miles, or anyone who has been on the receiving end of a staged shunt attempt, a two-channel setup is worth the extra. The rear camera is usually small and mounts on the tailgate glass, with a cable run along the headlining.

    Interior-facing cameras are a different question. They make sense for private hire and taxi work, and for a business that wants a record of what happened in the cab. For a private car they are usually unnecessary, and they raise questions about recording passengers that are simpler to avoid.

    Parking Mode, And What It Actually Needs

    Parking mode is the feature people most want and most often end up not really having. There are two common types:

    1. Impact-triggered. The camera sits dormant and wakes when the G-sensor detects a knock, then records a short clip. Low power draw, but it misses everything up to the moment of impact and misses anyone who keys the car without shaking it.
    2. Time-lapse or motion-triggered. The camera keeps recording at a low frame rate, or wakes on movement in frame. Much more useful, considerably more power hungry.

    Either way, parking mode needs power with the ignition off, and that is the part that gets skipped. A cigarette socket that dies with the ignition gives you no parking mode at all. You need either a hardwire into the fusebox on a permanent live, or a dedicated dashcam battery pack.

    A hardwire kit worth having includes low-voltage cutoff, which stops the camera drawing power once the car’s battery falls to a set voltage. Without it, a camera left recording for a few days in a car that is not being driven can flatten the battery β€” and on a modern car with a stop-start battery that is not a trivial thing to have done.

    Worth knowing: if you leave a car standing for days at a time, parking mode and a tired battery are a bad combination. Set the cutoff voltage conservatively, and if the car already struggles to start after a week of not being used, get the battery and charging system checked before you add a permanent drain to it.

    Hardwiring Versus The Cigarette Socket

    A socket plug is fine if you only want footage while driving and you do not mind the cable. Hardwiring is better for three reasons: parking mode works, the socket stays free, and there is no cable draped across the dashboard for the camera to be pulled off by.

    Hardwiring means taking a switched live and a permanent live from the fusebox with the right fuse taps, earthing it properly, and routing the cable behind the trim rather than through it. On a lot of modern cars the fusebox is not where you would guess and some circuits are not suitable to tap, so it pays to know which ones are. We fit and hardwire dashcams at the customer’s home, front and rear, with the cabling hidden β€” which is the bit that takes the time.

    GPS And Speed Stamping

    GPS logging records where you were and how fast you were going, stamped onto the footage. It is genuinely useful when the dispute is about location or approach speed, and it is the difference between footage that shows an incident and footage that proves the circumstances.

    The obvious caveat is that it cuts both ways. If you were over the limit, that is on the recording too. That is an argument for driving sensibly rather than for turning GPS off.

    Loop Recording And Cards

    Every dashcam loops: it fills the card and then starts overwriting the oldest footage. Two things follow from that.

    First, you have to save clips you care about, either by pressing the protect button at the time or by pulling the footage off before the loop comes round. On a small card in a car doing big mileage, that can be a day or two. If something happens, get the file off the card that evening.

    Second, card choice is not a detail. Loop recording writes to the same card continuously, for years, in a hot windscreen. Standard cards are not built for that and they fail β€” often silently, so the camera looks like it is recording and the card is producing nothing. Use a high-endurance microSD card intended for continuous video, buy it from somewhere reputable because fakes are everywhere, and format it in the camera every couple of months. Cards are consumables; budget for replacing one every year or two.

    It is worth checking the footage occasionally as well. The number of people who discover their dashcam has not recorded anything for six months, at the exact moment they need it, is depressing.

    What Insurers Actually Accept

    Insurers will generally look at dashcam footage, and it often resolves liability quickly, which is the real benefit β€” a settled claim rather than a split-liability outcome. What helps is straightforward: the original unedited file rather than a phone video of a screen, a clear timestamp and ideally GPS data, and footage submitted promptly.

    Two things to be aware of rather than assume. Some insurers offer a discount for having a camera fitted and many do not, so do not buy one expecting the premium to pay for it. And a camera does not only exonerate you β€” footage showing you at fault is still evidence. Policies and their wording vary, so if a discount or a footage requirement matters to you, check your own insurer’s current terms.

    Fitting Neatly Matters As Much As The Camera

    A good camera badly fitted is worse than a modest camera fitted properly. What “properly” means:

    • Mounted high and tight behind the mirror, in the area swept by the wipers, not low on the screen where it blocks your view or sits in the wrong place for the MOT.
    • Not in front of a windscreen-mounted sensor for rain, light or driver assistance, and not covering a camera the car already has.
    • Cable tucked into the headlining and down the A-pillar, with nothing near an airbag path.
    • Angled so the horizon sits around a third of the way down the frame β€” too high and you record sky, too low and you record bonnet.
    • Time and date set, and checked after the clocks change, because a wrong timestamp undermines everything the footage shows.

    Get those right and even a mid-range camera will give you the frame you need. Get them wrong and the best camera on the market will hand you footage of the sky above a junction.

    Want A Dashcam Fitted Properly?

    Front and rear, hardwired with cables hidden and parking mode set up safely, at your home or workplace.

    πŸ“ž Call 07803 397561 Message On WhatsApp
  • DPF Light On? Short Journeys Are Usually Why

    πŸ“ž 07803 397561 βœ‰οΈ info@vdlvehiclesolutions.co.uk πŸ“ Derbyshire Β· Staffordshire Β· Cheshire Emergency Call-Outs Available
    Home β€Ί Blog
    Diagnostics & Warning Lights

    DPF Light On? Short Journeys Are Usually Why

    VDL Vehicle Solutions Β· 28 October 2026

    A DPF light is rarely a broken part. It is usually a diesel being used in a way that never lets it clean itself β€” and how you respond in the first few days decides whether this is a cheap problem or an expensive one.

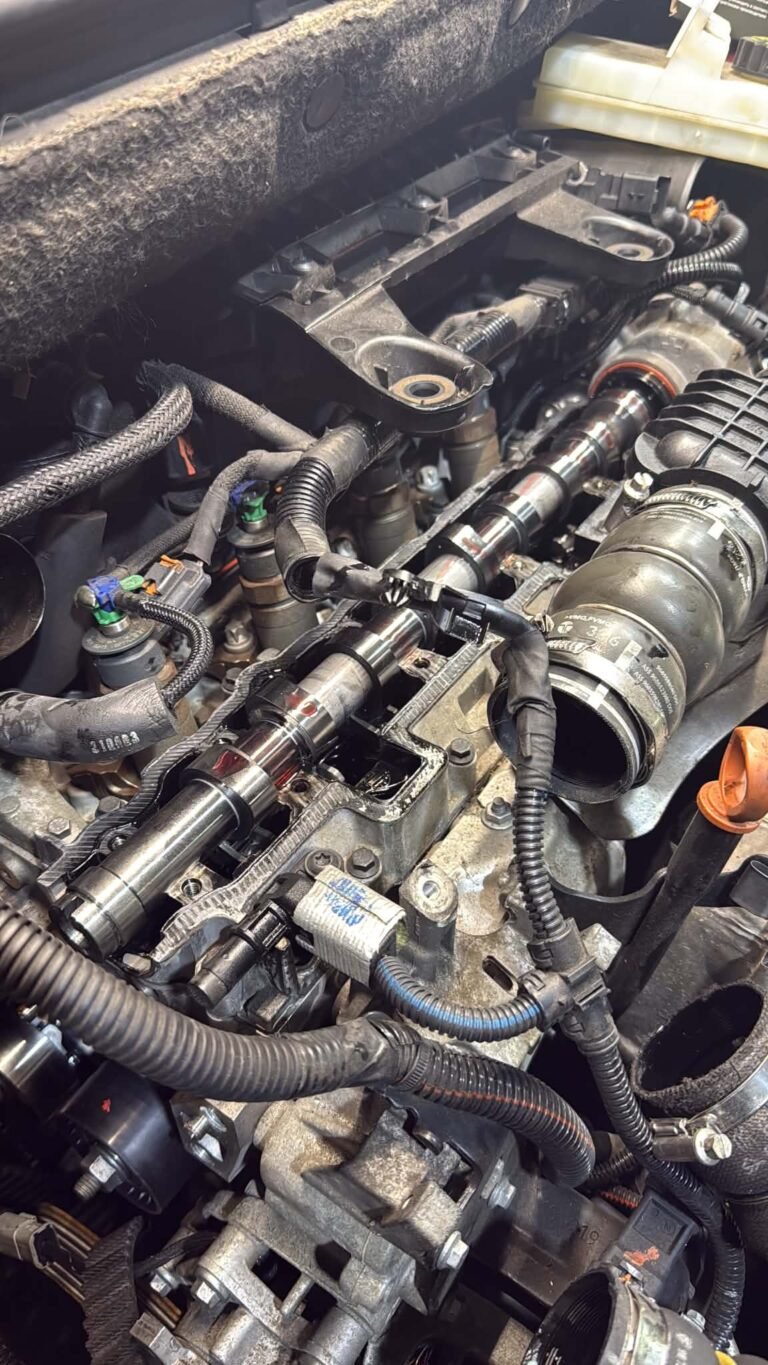
    Diesel engine bay stripped down for injector work

    The diesel particulate filter sits in the exhaust and traps the soot a diesel engine produces. That is all it does. It is a ceramic honeycomb with channels blocked at alternate ends, so exhaust gas has to pass through the walls and the soot stays behind. It works extremely well, which is exactly the problem β€” anything that traps soot eventually fills with soot, and it has to be emptied somehow.

    The way it empties is by getting hot enough to burn the soot off into ash and gas. That process is called regeneration, and everything that goes wrong with a DPF comes back to regeneration not happening often enough.

    Passive And Active Regeneration

    Passive regeneration happens on its own, with no input from the engine management, when the exhaust is running hot for a sustained period. Steady motorway or dual-carriageway driving does it. You never know it has happened, and it is the ideal way for a DPF to stay clean.

    Active regeneration is the fallback. When the car works out the filter is filling β€” usually by measuring the pressure difference across it and by counting the soot it thinks it has produced β€” it deliberately raises the exhaust temperature. It does this by injecting extra fuel late in the cycle, adjusting timing, and often by closing off the intake slightly. The exhaust gets very hot and the soot burns off.

    An active regen needs several things to be true at once: the engine at proper operating temperature, a reasonable amount of fuel in the tank, a steady load, and β€” crucially β€” enough time. It is not a two-minute process. If you switch off partway through, the cycle is abandoned and has to start again from the beginning next time.

    Why A School-Run Life Never Gets There

    Consider a typical week: two miles to school, a mile to the shop, four miles to work, the same back. Every journey is short, the engine may barely reach full temperature before it is switched off, and the exhaust never sees the sustained heat passive regeneration needs.

    Worse, the car keeps trying to run active regens and keeps being interrupted. Each abandoned attempt dumps extra fuel into the engine, some of which finds its way past the rings into the sump. That is why cars used like this often show a rising oil level, and why the oil ends up diluted with diesel β€” which is not doing the engine any favours either.

    So the filter fills, the attempts to clear it fail, and eventually the car tells you about it.

    What The Light Actually Means, Stage By Stage

    DPF warnings are not one message. Roughly, and the exact behaviour varies by manufacturer:

    1. DPF light on, nothing else. The filter is loaded but within range, and the car is asking for a proper drive so it can complete a regen. This is the cheap stage. Act now.
    2. DPF light plus reduced power, or the light flashing. The filter is heavily loaded and the car has restricted output to protect itself. A drive may still clear it, but you are closer to the edge.
    3. Engine management light joins in, limp mode, will not rev past a certain point. The car has given up on self-clearing and has logged faults. This now needs equipment, not a drive.
    4. Warnings about oil level or oil dilution. Repeated failed regens have put diesel in the sump. This needs an oil and filter change as well as the DPF sorting.

    People routinely drive around at stage one for months because the car still goes. That is how a problem that a forty-minute drive would have fixed becomes a filter that has to come off.

    The Long Drive Fix, And When It Is Too Late

    At stage one, the fix genuinely is a decent drive. What that means in practice: get the engine fully warm first, then find a dual carriageway or a fast A-road and hold a steady speed in a gear that keeps the revs up β€” somewhere around 2,000 to 2,500rpm is the usual advice β€” for a good twenty to forty minutes without stopping. Do not sit in traffic, do not do it in top gear at 40mph, and do not switch off as soon as you get home if it feels like something is happening.

    You can often tell a regen is running: a hot, slightly acrid smell, the cooling fan running hard when you stop, a change in idle, sometimes a faint whistle. If the light goes out, it worked.

    It is too late for the drive-it fix when the car is in limp mode, when the light is flashing and power is well down, or when it has gone through several cycles of clearing and coming straight back. At that point the filter is loaded beyond the level at which the car will risk an active regen, because burning off that much soot at once can crack the ceramic. Sensibly, it refuses.

    Worth knowing: soot burns off in a regen, but ash does not. Ash is the leftover from burnt soot and from oil additives, and it accumulates for the life of the filter. That is why a high-mileage DPF can be permanently blocked even though it has been regenerated faithfully β€” and why a filter that fills again within a few hundred miles of a successful regen is telling you it is full of ash, not soot.

    Forced Regeneration

    A forced regen is a regeneration commanded through the diagnostic socket rather than initiated by the car. It bypasses the conditions the car would normally insist on and runs the cycle under controlled conditions while the vehicle is stationary, with the engine held at a set speed and the exhaust temperature monitored.

    It is a proper job rather than a button press. The soot load has to be read first, because forcing a regen on a filter that is too far gone can damage it. Related faults need checking at the same time β€” a leaking injector, a faulty differential pressure sensor, a split in the exhaust ahead of the filter, a stuck EGR valve or a glow plug fault will all stop regens working, and clearing the filter without fixing the cause just resets the clock. If the oil is diesel-diluted it should be changed as part of the work.

    We can run a forced regeneration and full diagnostic check at your home or workplace, which is usually more convenient than leaving a car somewhere for a day. If the filter turns out to be ash-loaded rather than soot-loaded, no amount of forcing will help and the honest answer is cleaning off the vehicle or replacement β€” that gets booked in with us rather than done on a driveway.

    Why Removal Is Not An Option

    Removing or gutting a DPF, or fitting a delete map, comes up constantly because it appears to solve the problem cheaply. It does not, for reasons that have nothing to do with opinion:

    • A vehicle first fitted with a DPF cannot pass an MOT with it missing β€” testers check for it visually, and a removed filter is a failure.
    • Driving a vehicle whose emissions control has been defeated puts you on the wrong side of the rules on using a vehicle in a modified condition, and insurers treat an undeclared emissions modification as exactly that.
    • Resale becomes somebody else’s problem to discover, which is a poor position to be in.

    The specifics of the rules do change, so check the current position rather than relying on what was true a few years ago β€” but the direction of travel has only ever been one way, towards more scrutiny rather than less.

    Is A Diesel Just The Wrong Car For You?

    This is worth saying plainly, because it is the actual answer for a lot of people. If your annual mileage is low and almost all of it is short, cold, stop-start journeys, a modern diesel is working against its design every single day. You will keep having DPF problems, you will get diesel in the oil, and you will spend money at intervals on a fault that is really just a mismatch between the car and the use.

    If your driving includes regular longer runs β€” a commute of fifteen miles or more, motorway work, towing, or the sort of mileage that comes with living out in the villages and driving into Stockport or Stoke β€” a diesel is fine and the DPF will look after itself.

    The middle ground is to keep the diesel and change the habit: once a fortnight, take it for a proper run and let it get hot. That is not a fudge, it is genuinely what the filter needs.

    DPF Light Not Going Out?

    We will read the soot load, check what is stopping regens, and tell you whether a forced regen will fix it.

    πŸ“ž Call 07803 397561 Message On WhatsApp
  • Breaking Down On A Rural Road: What To Do First

    πŸ“ž 07803 397561 βœ‰οΈ info@vdlvehiclesolutions.co.uk πŸ“ Derbyshire Β· Staffordshire Β· Cheshire Emergency Call-Outs Available
    Home β€Ί Blog
    Winter & Seasonal

    Breaking Down On A Rural Road: What To Do First

    VDL Vehicle Solutions Β· 26 October 2026

    A breakdown on a country lane is a different problem from a breakdown in a car park. The first two minutes matter more than anything you do afterwards, so it is worth knowing the order before you need it.

    Mobile mechanic van with doors open at a roadside breakdown

    Most drivers have a rough plan for breaking down on a motorway, because it gets drilled into you. Far fewer have thought about the lanes between Buxton and Ashbourne, the climbs over the moors, or the stretch of A-road where the verge disappears and there are hedges on both sides. Those are the places where a breakdown gets genuinely dangerous, and where getting the order right makes the difference.

    The order below is deliberately about safety first and the car second. The car is already broken. It will still be broken in five minutes.

    1. Get Off The Carriageway If The Car Will Still Move

    The single best thing that can happen is that you coast somewhere sensible before you stop. If the engine has cut out, you usually have momentum and some steering left, and that is worth spending immediately rather than stopping where you are and thinking about it.

    What you are looking for, in order of preference: a lay-by, a field gateway, a farm entrance, a pub or hall car park, a wide verge, the inside of a straight. What you are trying to avoid above all is stopping on a blind bend or just over the crest of a hill, because the first driver who comes round or over will have no time at all.

    If you have a choice between a slightly awkward gateway fifty yards further on and stopping on a bend now, take the gateway. Steering a dead car is heavy and the brakes lose assistance, so it takes more effort than you expect β€” but it is usually doable at low speed.

    2. Hazards On, Straight Away

    Hazard lights before anything else, before you look under the bonnet, before you get your phone out. On an unlit lane at dusk they are the only thing telling an approaching driver that a stationary object is a car and not part of the scenery. Leave the sidelights on too if it is dark or murky.

    If you have a warning triangle and you are somewhere with a decent view β€” a straight, or a road where traffic is slow β€” put it out well back from the car. If you are on a bend or a fast road where standing in the carriageway to place it means walking into traffic, do not. Never put a triangle out on a motorway.

    3. Decide Whether To Get Out Or Stay Put

    This is the part where the standard advice gets misapplied, and it is worth thinking about properly.

    On a fast road β€” a dual carriageway, or an A-road where traffic is doing sixty β€” the safest place is out of the car and behind a barrier or up the bank, on the side away from traffic, with everyone out via the doors furthest from the carriageway. A stationary car being hit from behind at speed is the scenario that kills people, and sitting in it is the worst place to be.

    On a narrow lane with bends and hedges, the calculation changes, but not in the way people assume. Staying in a car parked on a blind bend is genuinely dangerous, because the impact that reaches you is the one that nobody saw coming. If the car is somewhere exposed, get out and get behind something solid β€” a wall, a gate, a bank β€” even if it means standing in a wet field for twenty minutes.

    The times it is reasonable to stay in the vehicle are when you are properly off the road in a lay-by or gateway with a clear view, or when getting out would put you in more danger than staying β€” no verge at all, water, or a situation where you cannot safely get everyone clear. If you do stay, seatbelts on, facing forwards, doors unlocked so help can reach you.

    Worth knowing: on any road where traffic is moving quickly, leave the vehicle by the passenger side and get behind a barrier. Standing in front of the car, or leaning into the engine bay from the road side, puts you in the exact spot a distracted driver will occupy.

    4. Work Out Where You Are Before You Lose Signal

    Signal in the valleys around here is patchy to non-existent. Down in the Goyt, parts of the Dove valley, the lanes behind Whaley Bridge and plenty of the moorland roads, you may get one bar for a few seconds and then nothing. That makes a precise location the most valuable thing you can have ready.

    Build a description you can give in one go:

    • The road number if it has one β€” A537, A54, B5470 β€” and which direction you were travelling.
    • The nearest village either side, and roughly how far. “About a mile past Wildboarclough heading towards Congleton” is far more useful than a postcode you guessed.
    • The last thing you passed β€” a pub, a farm sign, a bridge, a reservoir, a cattle grid, a junction. Landmarks work in a way coordinates you cannot load do not.
    • What3words or a grid reference if you have any data at all and can open the app. If you can, read it out immediately, before signal drops again.

    If you have no signal where the car is, walk to higher ground to make the call rather than staying by the car hoping it improves. Take your phone, keys and a coat, and if there is anyone with you, leave them somewhere safe rather than in the vehicle if the vehicle is exposed.

    5. Have The Right Information Ready When You Call

    If signal is marginal, a call can drop halfway through. Get the essentials out first, in this order, rather than starting with the history of the noise:

    1. Your location, as above.
    2. Your phone number, in case you get cut off.
    3. Make, model and registration, and roughly the age of the vehicle.
    4. What actually happened β€” cut out and will not restart, will not crank at all, overheating, warning light, flat tyre, lost drive.
    5. Whether you are somewhere safe, and whether there are children, older passengers or a dog in the vehicle.
    6. Whether the car is blocking the road.

    The last two change how a job gets prioritised, so say them early. “I am half in the carriageway on a bend with two kids in the back” is a very different call from “I am in a lay-by and I am fine for a while”.

    What Can Be Fixed There, And What Cannot

    A fair proportion of rural breakdowns are fixable at the roadside. Flat batteries, failed alternators and charging faults, fuel and ignition problems, sensors, a coolant leak that can be traced and patched, a wheel change, electrical faults where damp has got somewhere it should not be. Those are the jobs a mobile roadside repair is genuinely better for, because fixing the car where it stands avoids the cost and time of getting it off a hill first.

    Some things are honestly not roadside jobs, and it is better to say so than to spend two hours proving it. A cambelt failure, a head gasket, a clutch, a gearbox, anything that needs the car raised properly or a part that has to be ordered, and any fault that means the car is not safe to drive even once it starts. Those are recovery, then booked in with us to do properly. Overheating is the one people push their luck with β€” if the temperature gauge is in the red or there is steam, stop and do not restart it, because a fifteen-minute recovery wait is cheaper than a head.

    What To Keep In The Car

    You do not need a survival kit. Four things cover most of it: a warning triangle, a decent torch that is not your phone, a hi-vis or at least a light-coloured coat, and a power bank so a dying phone does not become the real emergency. If you drive the tops in winter, add a blanket and a bottle of water, because waiting is a bigger part of a rural breakdown than it is in town.

    We cover emergency call-outs across the Peak and the surrounding lanes when available, and being told exactly where you are is what gets somebody to you quickly. Everything else can be worked out when we get there.

    Broken Down Somewhere Awkward?

    Ring with your location and what the car is doing, and we will tell you straight whether it is a roadside fix.

    πŸ“ž Call 07803 397561 Message On WhatsApp
  • Van Tool Theft: Making Your Van A Harder Target

    πŸ“ž 07803 397561 βœ‰οΈ info@vdlvehiclesolutions.co.uk πŸ“ Derbyshire Β· Staffordshire Β· Cheshire Emergency Call-Outs Available
    Home β€Ί Blog
    Vans, Fleet & Security

    Van Tool Theft: Making Your Van A Harder Target

    VDL Vehicle Solutions Β· 23 October 2026

    For a sole trader, losing a van full of tools overnight is not an inconvenience β€” it is the end of trading until the money is found to replace them. Here is how to make yours the van they walk past.

    Deadlock fitted to the side door of a work van

    The uncomfortable truth about van break-ins is how fast they are. Nobody spends twenty minutes on your side door hoping for the best. They arrive knowing what they are doing, they are in and out in well under a minute, and they take whatever is nearest the door. The whole strategy is speed, and everything that works against them is about making the job take longer than they are willing to spend.

    That is the mindset worth having. You are not trying to build a vault. You are trying to be the van that costs more effort than the one parked three doors down.

    Where They Actually Attack

    Knowing the weak points matters, because a lot of money gets spent protecting parts of a van nobody bothers with.

    • The door skin. Peeling is now the common method on many popular vans β€” the outer skin near the lock is bent back with a bar until the mechanism is exposed and can be operated directly. The factory lock is never touched.
    • The lock barrel itself. Older and simpler locks can be attacked with a screwdriver and enough force, or picked quickly on vans with known weaknesses.
    • The nearside sliding door. Pavement side, out of sight of the house, usually the first choice.
    • The rear doors near the handle. Same peeling principle, and on a lot of vans the rear doors are the least reinforced panel on the vehicle.
    • The roof. Less common but it happens, particularly on high-roof vans left in yards, where a panel can be cut without anyone hearing from the street.
    • The bulkhead. If the cab can be opened, a soft or missing bulkhead means the load area is open too.

    Notice that most of these ignore the lock. That is why an alarm and a good key are not the answer on their own.

    Layer One: Extra Locks

    Additional locks are the most effective single change most people make, because they force the thief to defeat a second, separate mechanism that has nothing to do with the original lock.

    Deadlocks are keyed separately and throw a solid steel bolt into the door frame. They are strong, visible from outside, and because they are locked manually they cannot be defeated by anything electronic. The downside is that you have to remember to use them, and on a day of twelve calls that is a real discipline.

    Slam locks solve that problem by locking the moment the door closes. If you are in and out of the van all day β€” multi-drop, plumbing, servicing calls β€” slam locks are usually the better fit, because there is no version of the day where you forget. The trade-off is that you cannot leave a door on the latch, and you need to be organised about where the key lives.

    Plenty of vans end up with both: slam locks on the door you use constantly, deadlocks on the rear doors that only open when you are loading. We fit deadlocks and van security systems at the customer’s home or yard, so the van is not off the road for a day to have it done.

    Layer Two: Stop The Peeling

    If peeling is the method, reinforcing the panel is the counter. Anti-peel plates and repair plates spread the load across a much larger area of the door so that bending the skin no longer gets anyone near the mechanism. They are not glamorous and they are not expensive relative to a van of tools, and on the vans that are routinely targeted they are arguably more important than another lock.

    Lock shields and blanking plates over the original handle are worth considering at the same time, along with a proper steel bulkhead if the van has a mesh one or nothing at all.

    Worth knowing: a van that has clearly been attacked and held is still a damaged van. Peeling bends the door skin whether the thief gets in or not, and you may well be paying for a panel repair. Security spending is about not losing the tools, not about never having a bad morning.

    Layer Three: Empty It Where You Can

    No lock beats an empty van. If you have a garage, a lockable shed or a secure workshop at home, moving the expensive and portable items out overnight is the single most effective habit there is β€” cordless tools, laser levels, diagnostic kit, anything small with a strong resale market.

    For a lot of people that is genuinely impractical, and it is not worth pretending otherwise. The workable middle ground is to empty it of the high-value, easy-to-carry items and leave the bulky, awkward, hard-to-sell stuff in place. Stack the van so that anything worth having is at the bulkhead end, not by the doors, and use lockable steel drawer units or a bolted-down site box inside the load area. Every extra thing that has to be opened is more time on the clock.

    Layer Four: Mark Everything

    Marking tools does two things. It makes them harder to sell on, and it gives you a chance of getting them back if they are recovered. Do both of the following:

    1. Mark them visibly. Engrave, paint, or use a marking system on the body of the tool where a buyer will see it. A visible mark is a deterrent in a way a hidden one is not.
    2. Record them. Photograph each item, write down make, model and serial number, and keep that list somewhere other than in the van. Police cannot return a drill to you without evidence it is yours, and insurers will ask for exactly this list at the worst possible moment.

    Doing this on a wet Sunday afternoon is tedious. Doing it retrospectively, from memory, after the van has been emptied, is far worse.

    Layer Five: A Tracker On The Van Itself

    Sometimes the van goes too, either because the tools are in it or because the van is the target. A GPS tracker will not stop that happening, but it changes what happens next β€” a live location within minutes gives police something to act on while the vehicle is still moving, rather than a description and a plate number.

    Trackers are also genuinely useful day to day if you run more than one vehicle, for knowing who is where and for settling a question about what time a job started. We fit GPS trackers and camera systems as part of the same visit as locks, which saves doing the job twice.

    Does Signage Help?

    The honest answer is that it helps a little, and only when it is true. “No tools left in this van overnight” works on the thief who is choosing between vans, which is most of them. What does not work is a sticker announcing a security system you do not have β€” anyone doing this regularly can tell at a glance whether a van is actually deadlocked.

    The same applies to where you park. Nose-in against a wall so the rear doors cannot be opened, sliding door against a fence or a hedge, under a light, in view of a camera if you have one. None of it costs anything and all of it moves you down the list.

    The Insurance Trap

    This is where people get badly caught out, and it is worth reading your policy rather than assuming. Common conditions include a cap on tool cover that is far lower than the value of what you carry, a requirement that the van is locked and alarmed, a requirement that it is parked off-road or in a locked compound overnight, and an outright exclusion on anything left in the van between certain hours.

    Being outside any one of those conditions can mean a claim is reduced or refused entirely, even though the theft plainly happened. Check the overnight parking wording, check the per-item limit as well as the total, and check whether cover exists at all for tools as opposed to the van. Insurance terms vary a lot and change, so read your current documents rather than going on what a policy said three years ago.

    What We Would Do First

    If you are starting from a standard van with factory locks and a full load, the order that gets the most benefit for the least money is: extra locks on the doors you actually use, anti-peel reinforcement on the panels that get attacked, a proper bulkhead, then a tracker. Alongside that, mark and list the tools, and empty the van of the high-value items whenever you have somewhere to put them.

    None of it makes a van theft-proof. All of it makes yours the harder target, which is the whole game.

    Want Your Van Secured Properly?

    We fit deadlocks, slam locks, trackers and camera systems at your home or yard, so the van stays working.

    πŸ“ž Call 07803 397561 Message On WhatsApp